1.2 Your First Java Web Project
In this section, you will get your hands dirty by building a simple Hello World application using Jakarta EE technologies in IntelliJ IDEA. Detailed instructions on how to download and install necessary softwares can be found in Appendix.
Here what you will need[1]:
- Java SE Development Kit (JDK) version 11 or later. You can get the JDK directly from IntelliJ IDEA or download and install it manually.
- Tomcat 9.
- A modern web browser (e.g., Edge, Chrome, Firefox and Safari) to view your web application.
Create a new Java Enterprise project
Click New Project button in the welcome screen of IntelliJ IDEA, or File | New | Project at the menu if you have already opened a project. In the New Project dialog, select Java Enterprise.

A short notes on the settings:
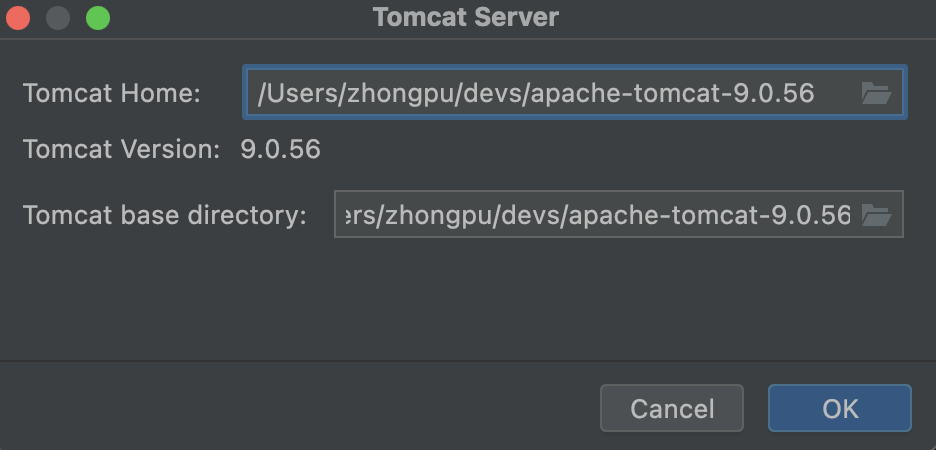
Location: The location this project locates, and it has to be an empty folder. If it does not exist, IntelliJ IDEA will create it for you.NameandArtifact: They have the same name with the selected folder by default.Group: To denote who builds this application, and it is fine to leave the default name com.example.Project template,Language,Build system, andTest framework: Select Web application, Java, Gradle, and JUnit, respectively.Project SDK: Use JDK 11 in this book[2].Application server: Click New | Tomcat Server (NOT TomEE Server), and then select the path you extracted the Tomcat (a.k.a,Tomcat Home, or formallyCatalina Home), and Intellij IDEA is able to detect its version. Then click OK.

Then click Next. Select Java EE 8 in Version field. Then click Finish. Depending on the network condition and CPU performance, you have to wait a dozen of seconds for Intellij IDEA doing some pre-processing work[3]. After the progress bar at the bottom of Intellij IDEA disappears, click the green right triangle button (▶) on the upper-right in Intellij IDEA to run this web application, and it will be launched in your default browser automatically.

Well done! You have created your first Java web project successfully. Feel free to click the hyperlink and explore your own website as depicted in Figure 1.6. And you can click the red square button (🟥) on the upper-right in Intellij IDEA to stop this web application.
Explore the default structure
IntelliJ IDEA creates a project with some boilerplate code that you can build and deploy successfully. In the left sidebar, a list of files and folders are displayed:
├── .gradle ①
├── .idea   ②
├── build   ③
├── gradle  ④
├── src
│   ├── main
|   |   └── java   ⑤
|   |   └── resources   ⑥
|   |   └── webapp
|   |       └── WEN-INF  ⑦
|   |       └── index.jsp  ⑧
│   └── test      ⑨
├── build.gradle  ⑩
├── gradlew ⑪
├── gradlew.bat ⑪
├── settings.gradle ⑫
It may seems quite complicate at the first glance, but this structure is easy to understand, and shared by many standard Java projects. Here are short notes on each file and folder listed above, and it does not matter even if you are unfamiliar with Gradle related stuff.
- ① A hidden folder for project specific Gradle library.
- ② A hidden folder generated by IntelliJ IDEA, containing IntelliJ’s project specific settings files.
- ③ A generated folder after you build or run the project, containing
.classandlibsfiles. - ④ A generated folder for Gradle wrapper files.
- ⑤ Default Java source folder, containing
.javafiles. - ⑥ Default Java resource folder where many Java libraries store their configuration files, or static files like
image,.mp3, etc. - ⑦ A folder inside
webappthat are accessible to the resource loader of your web application and not directly visible for the public. The well-knownweb.xmlcan be found there. - ⑧ Jakarta server page (JSP) file, roughly identical to the web pages we see in the browser[4].
- ⑨ Default Java test source folder.
- ⑩ Build script of this project, specifying the tasks like how to build, and package. Particularly, it can help us to handle dependencies management.
- ⑪ Gradle wrapper start scripts, for Unix-like platforms and Windows, respectively.
- ⑫ Settings file to define build name and sub-project.
If you would like to distribute your project as source code, for example, using Git, then ①, ② and ③ can be safely ignored, because they will be re-generated again when this project is imported.
[!NOTE] Gradle and IntelliJ IDEA (as well as the related files) are not necessary to develop a Java EE project, but they make our lives easier. You can use other alternatives (e.g., Maven), and even do not rely on any extra tools by writing the code from scratch using a plain text editor.
Write your first line of code
Due to the boilerplate code generated by IntelliJ IDEA, you can launch the web application directly without writing a single line code. Now, let's get started to make the web page different.
Open src | main | webapp | index.jsp, and update Line 8 and 9 to:
<h1><%= "Hello World, My First Java Web Application!" %>
</h1>
Stop the web application first by clicking red square button (🟥) in the toolbar of IntelliJ IDEA, if it is running, and then click the green right triangle button (▶) to run it. See what happens in your web browser? The title becomes Hello World, My First Java Web Application!, and that is what you just updated in index.jsp.
You may notice what is displayed in the address bar of your browser is quite long, and the following is what was shown in our computers:
http://localhost:8080/Gradle___com_swufe_javaee___first_java_ee_1_0_SNAPSHOT_war/
Let's make some magic to shorten it! From the main menu, select Run | Edit Configurations. As the name implies, it is the location to configure how this program runs.

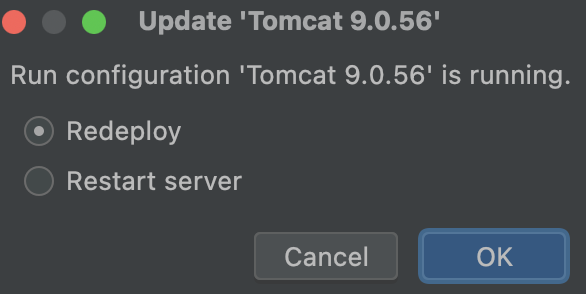
In Deployment tab, update Application context text box at the bottom to a shorter one, say /first_java_ee_1_0_SNAPSHOT_war[5], then Click OK button. As we did just now, stop the web application and then start it again. Alternatively, you can also re-deploy this web application by clicking the re-start button which is converted from ▶, and then select Redeploy.

By the way, some beginners might want to know what deployment is exactly. Quotes from Oxford Languages:
the action of bringing resources into effective action.
Similar to the meaning in the dictionary, deployment in programming means the action that converts codes into executable programs.
[1] This section is adapted from Tutorial: Your first Java EE application.
[2] At the time we wrote this book (of October, 2021), Java 17 and later versions were not yet supported for Gradle.
[3] IntelliJ IDEA would build index for your project, and as for a new project with Gradle building system, it would also download the Gradle library and dependencies. But from the second time on, the pre-processing time will be much shorter.
[4] JSPs cannot be displayed in the browser directly, and they must be translated into servlets at runtime in the web container.
[5] It must be started with a slash (/).